
On This Page
Need more help?
 Contact Us
In brief, there are four recommended ways to record video-based content for your course site; on your phone, in a CYO studio, voice over PowerPoint and screen capture using Canvas studio.
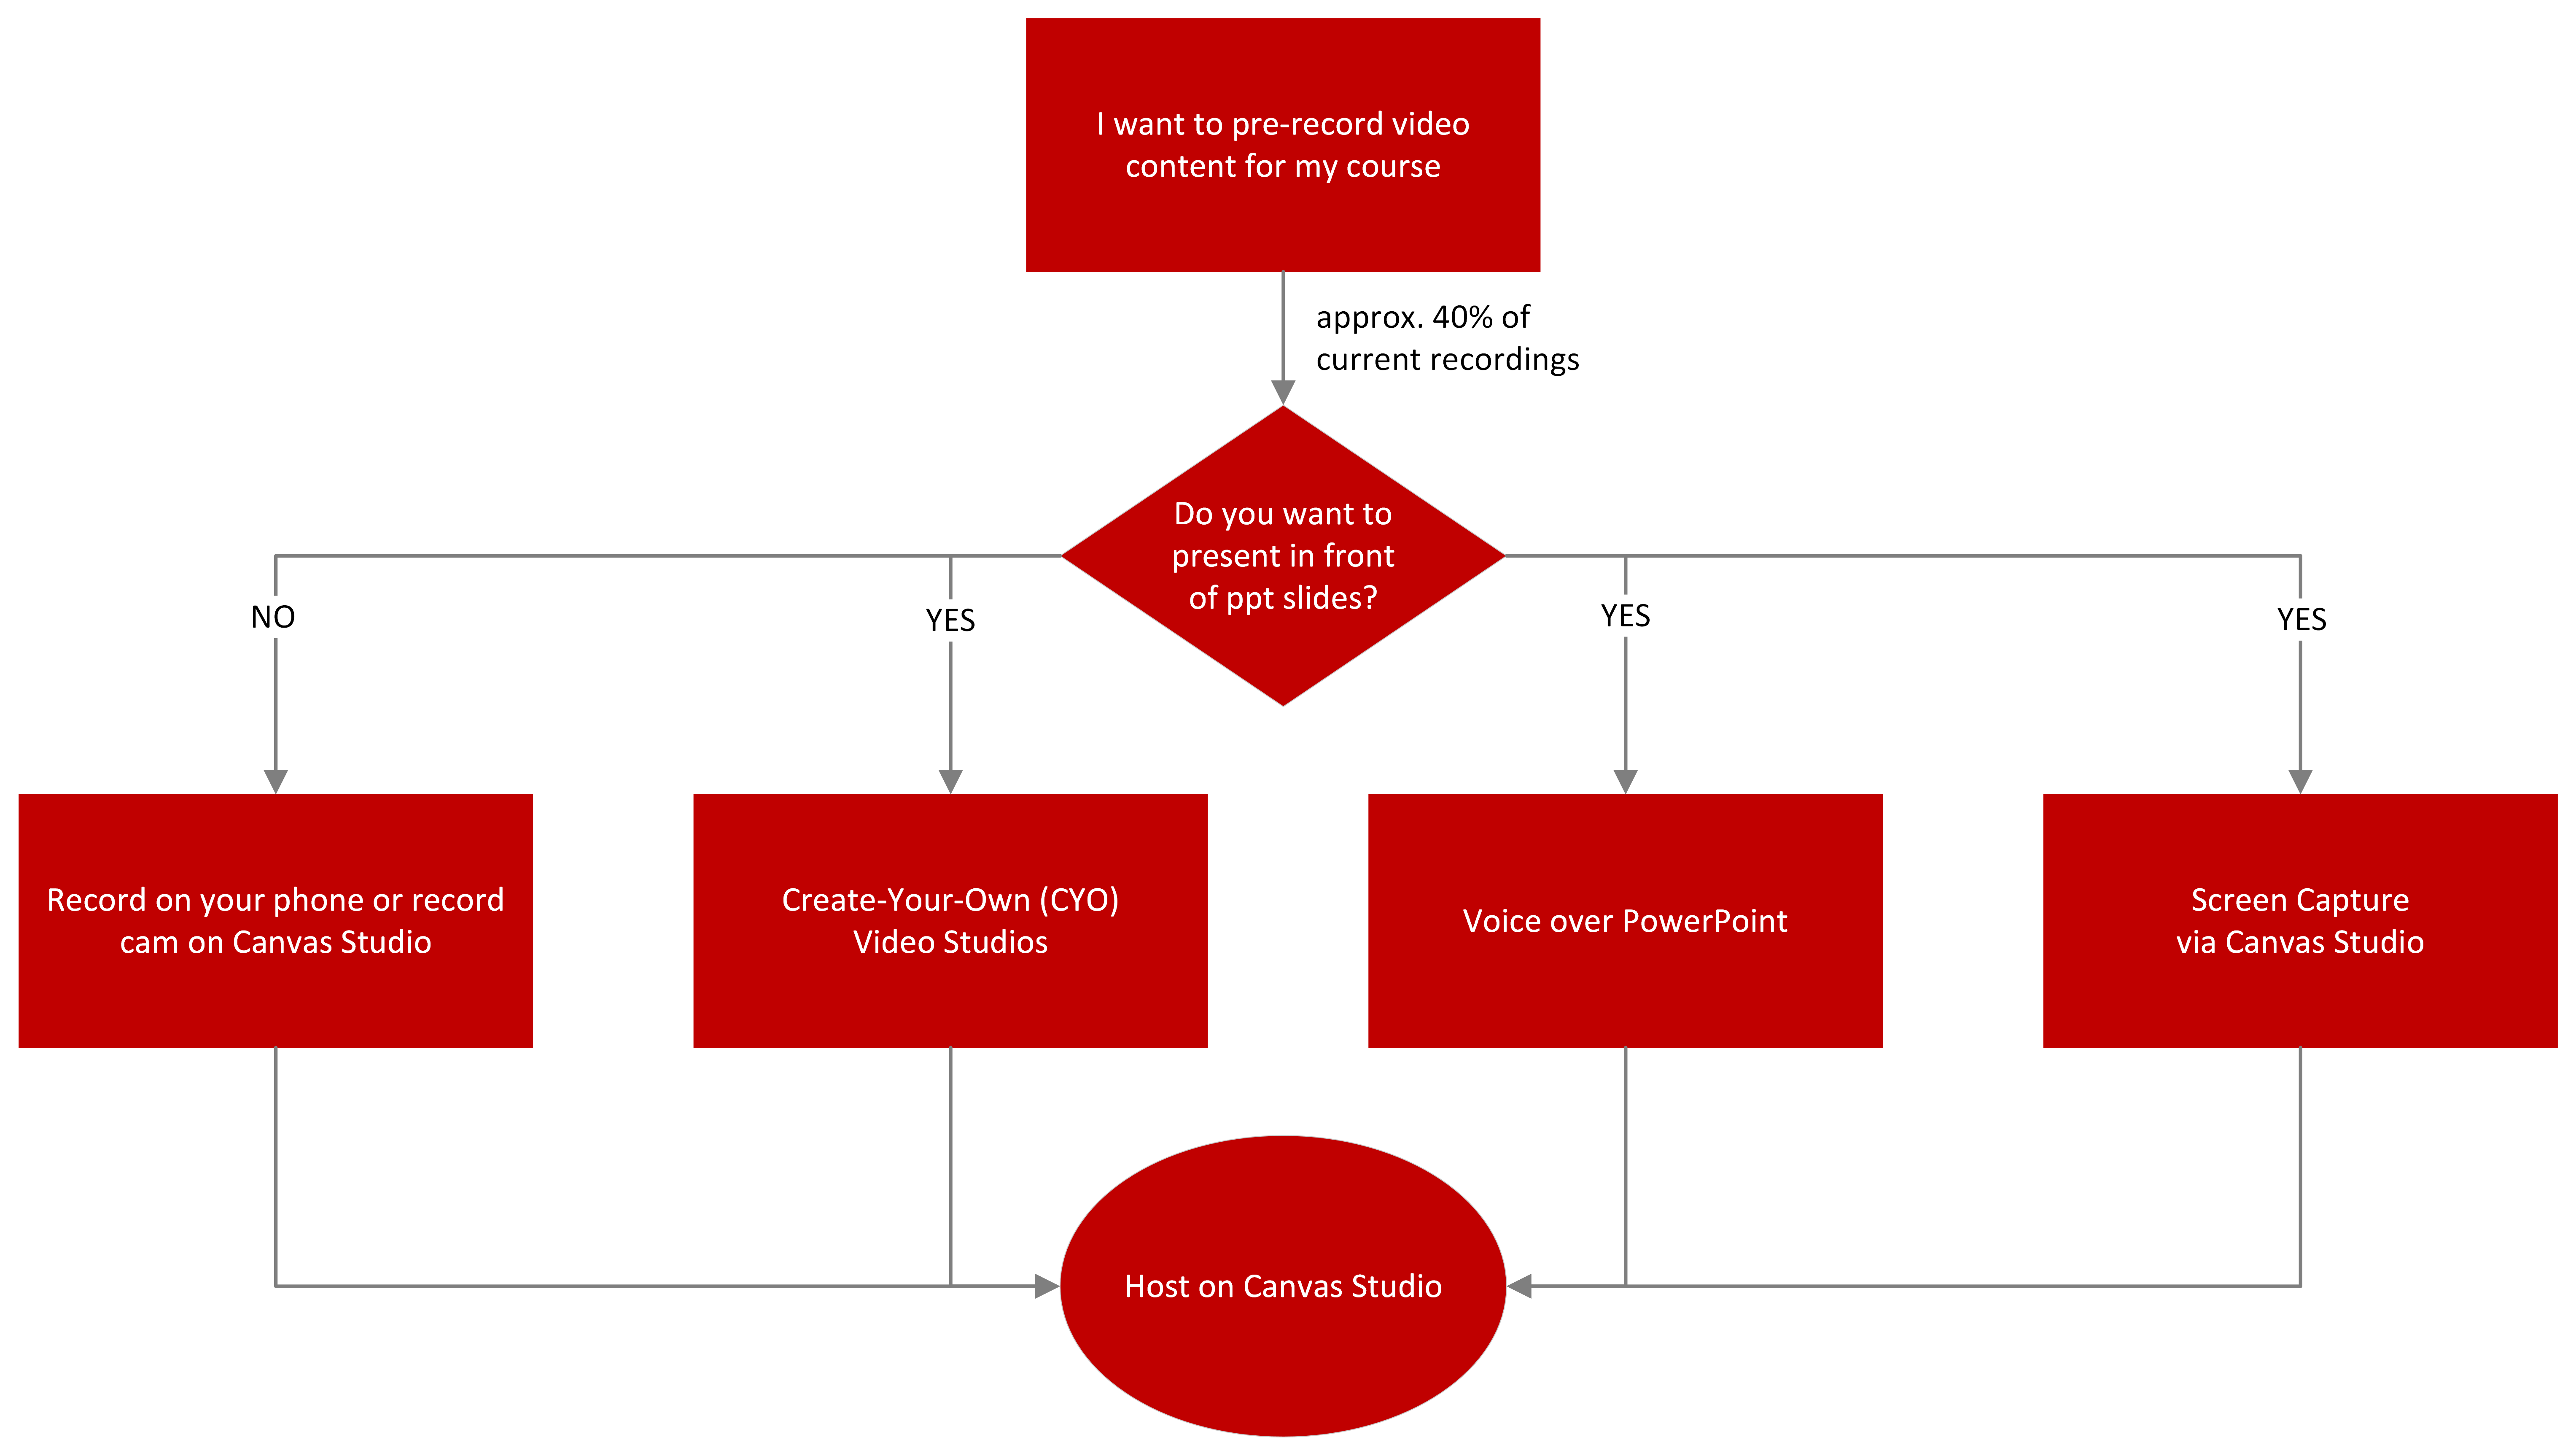
Figure visualises four ways of recording content for your course site and where it is managed
How I record video-based content for my course site?
| Questions | Recordings using your smartphone | CYO Studios | Voice over PowerPoint | Screen Capture / webcam recording via Canvas Studio |
|---|---|---|---|---|
| Links to site | Mobile | |||
| Where is this hosted? | Recommended to host on Canvas Studio (Canvas Guides) | Recommended to host on Canvas Studio (Canvas Guides) | Recommended to host on Canvas Studio (Canvas Guides) | Recommended to host on Canvas Studio (Canvas Guides) |
Useful resources
A range of resources have been created to support you in creating and deploying fit-for-purpose educational videos.
- Video in Education
- Create: creating videos for education
- Curate: curating vs creating video content
- Present: why presence and presentation matter
- Engage: passive consumption vs active learning
- Mobile: creating videos on mobile
Promote Universal Design for Learning by enabling captions and transcripts on your video content. For more information, visit the Captions and Transcripts page in the L&T Support site.
Details on how to manage edit your recordings can be found at Editing video-based content, while further guidance on storing your recordings can be found at Managing video-based content.
Recording video using PowerPoint (with and without webcam)
Step 1: Check you are using the latest version of PowerPoint
Older versions of PowerPoint do not include the full range of recording functions.
- Install PowerPoint:
- Log in to office.com
- Enter your Griffith email address e.g. bill.brown@griffithuni.edu.au
- Enter your Griffith sNumber and password
- Click Install Office and choose Office 365 apps
- Check if you have the latest version:
- Open PowerPoint desktop application
- Click File
- Click Account
- Click Update Options
- Click Update Now
Step 2: Put some POW into your PowerPoint
We all know the stories of dreary, hard-to-read PowerPoints! You can design your PowerPoints for maximum impact!
- Get great advice on Designing your presentation. (To save a copy of this file, open the File menu.)
- Check out Snapshot of video assignments created using PowerPoint (Microsoft Help).
- Find copyright free images
- Find out more about Finding free images and how to access Griffith collections.
Step 3: Record your video
In 2022, Microsoft introduced PowerPoint New Experience for recording in PowerPoint (Microsoft Help), so you might have the New or Classic Experience (Microsoft Help). The videos below show you each of these. Mac users also have these features.
New experience
The YouTube video - How to use the New PowerPoint Slide Recorder (YouTube) - is presented by Mike Tholfsen from Microsoft.
Classic Experience
In this video in Stream you can see how to record video in PowerPoint (Microsoft Help).
Step 4: Export your video
- Open the PowerPoint Desktop App (you can’t export a video in the browser version)
- Go to File menu
- Choose Export
- Choose Create a Video
- Check the settings
- Click Create Video
- Choose the location and Save
Canvas Studio Annotation
Whether you create your initial video in Canvas Studio or have uploaded or added third-party, you can take full advantage of Canvas Studio annotation to create interactive video experiences. Annotation allows you to add notecards and hyperlinks at significant parts of the video content along the timeline.

Benefits of interactive/annotated videos:
Enhanced Active Learning: Helping students actively engage with video content
- Providing interactivity promotes active learning engagement across your video content, moving students from passive to ‘Active viewing’.
- Studies show students learn more readily when they are actively viewing video content rather than passively ‘watching’. Giving students a reason to engage is key here.
- To encourage active learning using interactive note cards, you may add links to self-check quizzes, discussions or other related activities at certain parts of the video timeline.
Enhanced Signalling: Helping students know what matters
- Providing annotations to online content allows you to provide signaling when you are ‘not in the room’ or presenting.
- Best practices for the use of multimedia in education determine the use of signaling for students helps students understand which content is of high importance, and in-context relationships between related materials.
Reduced cognitive load: Helping reduce cognitive load for students
- Review is an important part of learning and assessment. Often our students may review long lecture recordings or third-party videos as part of this process.
- Adding annotation at the most imperative points will help keep students on track, reducing the cognitive load.
How do I add annotations to my media in Canvas Studio?
Interactive note card annotation features are available on all Canvas Studio content that has been uploaded, recorded and/or curated from YouTube or Vimeo to your library.
For more information, see How do I add annotations to my media in Canvas Studio? (Canvas Guides).
Microsoft Sway Update
New video and audio uploads in Sway have been discontinued as from 15th April.
Video and audio files will need to be stored in another location (e.g. OneDrive or SharePoint), then embedded in to the Sway: Embed content in your Sway. Further information can be found here Productivity Hub article for Sway.
Note that this change only affects uploading new video and audio files directly to a Sway and not video and audio files embedded from another source (e.g. OneDrive or SharePoint).