iPhone and iPad authentication options
You can authenticate using the following options
Swipe authentication
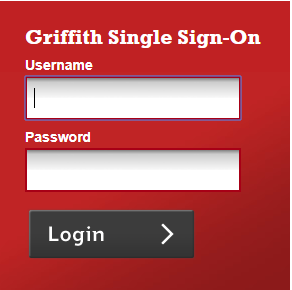
1. Login to the Griffith portal, or any Griffith system using Single Sign-on to access (e.g. email) from the browser > enter your sNumber and password.
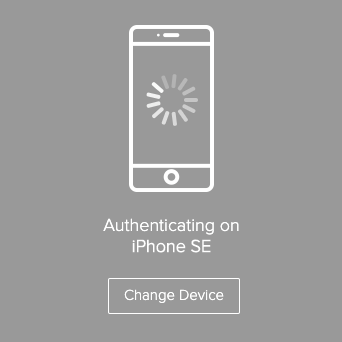
An Authentication window will prompt you to enter a passcode.
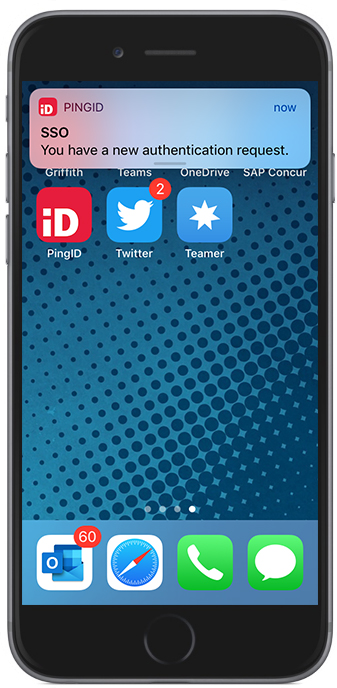
2. If your mobile device is unlocked > tap the notification and swipe to authenticate.
If your mobile device is locked > do one of the following (depending on your notification settings)
- The swipe screen appears > swipe to authenticate.
- A notification is shown on the lock screen > swipe left to unlock the screen > swipe to authenticate.

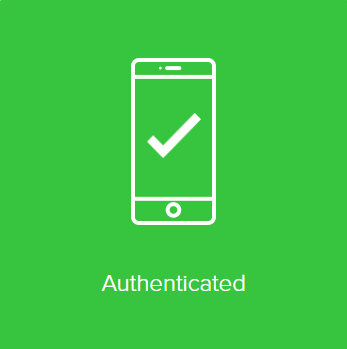
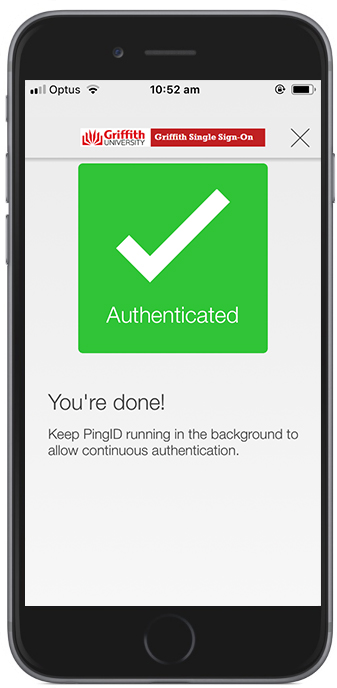
3. The green check mark indicating authentication is successful will appear and the Griffith resource will open.
Fingerprint authentication
You must have registered your fingerprints on your mobile device before setting it up for MFA.
Note: Authentication varies slightly depending on your device model, settings, and whether your device is locked or unlocked when the authentication request is sent.
1. Login to the Griffith portal, or any Griffith system using Single Sign-on to access (e.g. email) from the browser > enter your sNumber and password.
An Authentication window will prompt you to enter a passcode.
3. Do one of the following (depending on your notification settings).
Note: you may see a different screen depending on the iOS version.
a. If your mobile device is unlocked > tap the notification banner, or tap Approve.
If your mobile device is locked > slide the message to the left > tap Approve
Note: If you do not have the slide to view option > swipe right to unlock the device.
The fingerprint scan is activated and the Touch ID screen appears on your device > scan your fingerprint.
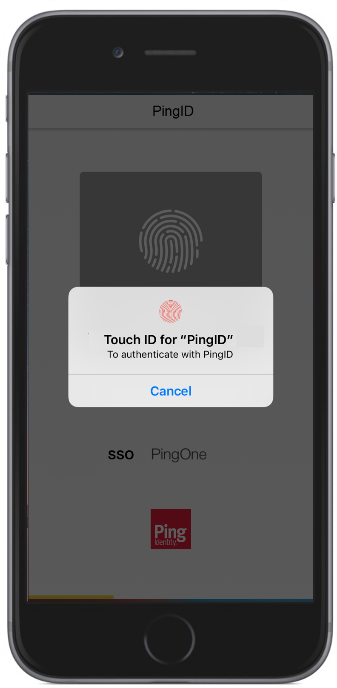
b. Tap the Home button lightly to scan your fingerprint.
Note: Do not press hard on the Home button, as this may cancel the authentication action, rather than approve it.
3. The green check mark indicating authentication is successful will appear and the Griffith resource will open.
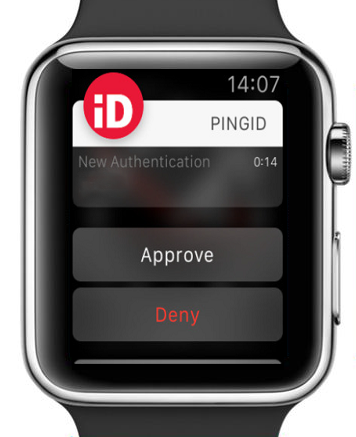
Apple watch authentication
If you have an Apple Watch paired with your iPhone, the PingID app automatically presents the Approve or Deny authentication notification on the Apple Watch, in parallel with your iPhone, so you can authenticate without taking your iPhone out of your pocket.
1. If your mobile device is inactive and your Apple Watch is on your wrist, when you log in, a notification appears on your Apple Watch as well as your mobile device.
2. Swipe up to view the message > tap Approve.
3. The green check mark indicating authentication is successful will appear on your web broswer and the Griffith resource will open.
One-time passcode authentication
If you don't have internet access on your mobile, you can still authenticate using PingID mobile app by generating a one-time passcode.
1. Login to the Griffith portal, or any Griffith system using Single Sign-on to access (e.g. email) from the browser > enter your sNumber and password.
An Authentication window will prompt you to enter a passcode.
3. Wait until the push notification timeout occurs > You will be prompted to enter a one-time passcode.
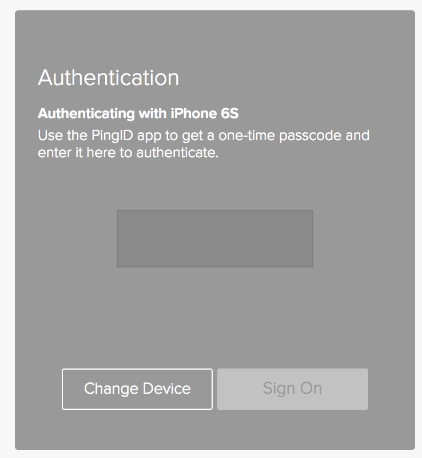
4. From your mobile device > open the PingID mobile App to view the current passcode.
Note: The one-time passcode refreshes each time you open the PingID App. To generate a new one-time passcode > tap New Passcode.

5. Enter the one-time passcode into the passcode field on the authentication screen on the browser and click Sign On.
You'll see a green checkmark indicating authentication is successful and your access is approved.
The Griffith resource that you wanted to access will open on the browser.