Recommended Migration Process for Researchers
This is just a guide to help you understand what to do. You might have done some of steps already. Some steps might not apply to you. Follow through the Pre-Migration, Migration and Post Migration steps as required.
Migration Process
Identify your folders/files
Identify what are your folders/files and what folders/files have been shared with you.
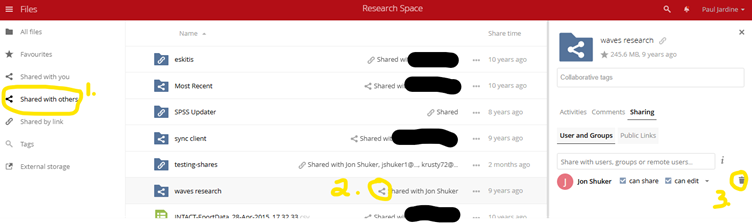
If you have shared data with others, you will need unshare before migration and to discuss with them about you unsharing the folders. Once unshared they will no longer have access to the folder, so you must share again post-migration
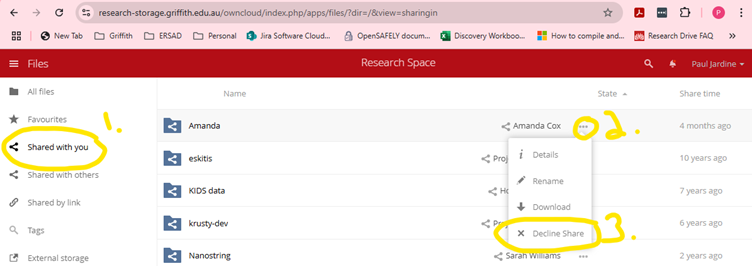
If you have folders/files being shared with you, please do not migrate. The owner of that folder/file will migrate it over. Contact that person to make sure they are migrating the folder.
You can check what folders/files are being shared with you and by you by going to the Research Space portal.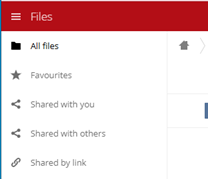
Decide where you want to migrate your folders/files to. This could be a combination of the storage platforms.
Plan your migration
Schedule a time to perform the migration. You want to make sure no one is working on the folders/files when you are doing the migration, because the folders/files will not be the latest.
We recommend migrating over a steady internet connection and during the Brisbane business hours (GMT+10) so help is available if needed.
Apply for storage on an available storage platform(s)
If you do not have available storage, then you will have to request storage on an available storage platform.
For more information, please read the below Question: How do I request storage in one of the available storage platforms?
Unshare folders in OwnCloud
If you have shared folders with others, we need you to unshare the data so that only 1 copy of the shared folder is mirgrated over.
You will need to notify people, who you have shared the folder with, and let them know you are unsharing the folder and will reshare folder in the new storage platform.
To unshare please see the below FAQ Question: How to Unshare folders/files.
Migrate Data Over
It is highly recommended that you migrate the folders/files to your local hard drive before moving into selected storage platform.
There are three methods to get your folders/files out of OwnCloud
- Download folders/files via the web browser - this is good for small folder sizes. Access Research Space. On the folder you want to download click on the three dots and select download.

- If the latest versions of your folders/files are on ownCloud sync folder on your local hard drive, then you do not have to do anything for this step.
- Use a third-party application (Cyberduck) to download data from the ownCloud server using the Webdav protocol. Instructions for this method can be found in the Manual under the webdav section.
Moving the downloaded data into selected storage platform
If your selected storage platform was Research Drive or Research Vault.
- Map the network drive folder (Drive or Vault) via the support instructions (you would have received an email with instructions, once the folder was created)
- Copy the data from your local hard drive to the mapped network drive folder.
- Once you are happy the folders and files are uploaded then you can delete the folders and files from the local hard drive (to free up space).
If your selected storage platform was SharePoint.
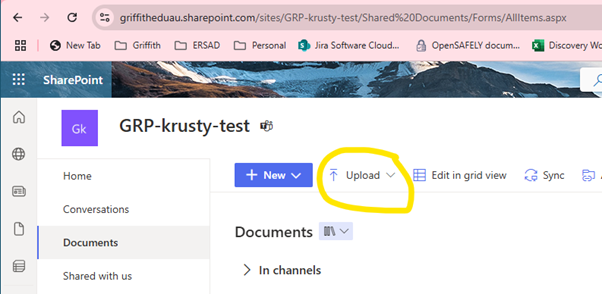
- You can upload the folders and files via the web browser.
- Open the SharePoint site in your web browser and select upload.
- You can also use the sync folder to migrate the folders and files into SharePoint.
- You would need to create a sync folder on your local hard drive first.
Open your SharePoint site and Select the Sync option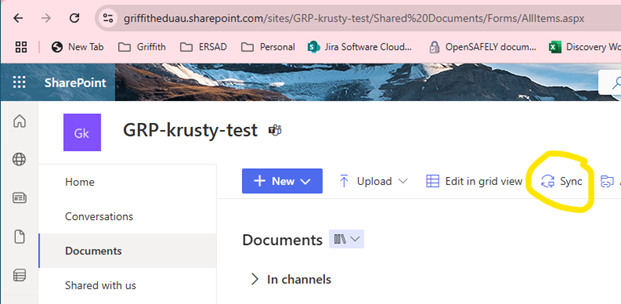
This will automatically create a sync folder on your desktop.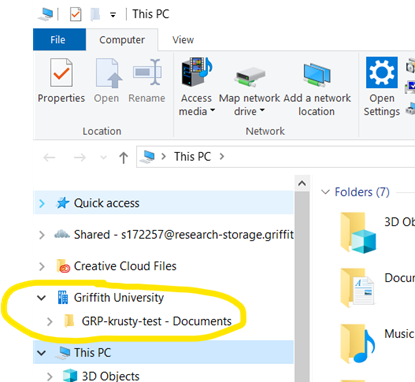
You can now simply copy the folders and files into this folder and the Microsoft OneDrive Sync client will sync the folders and files into your SharePoint site.
Reshare Folders
If your selected storage platform was Research Drive or Research Vault.
You will need to fill out the following Research Data storage access support form to setup sharing on the folders and files.
For Drive - Select option "Research Drive Add or Remove Permissions"
For Vault - Select option "Research Vault Add or Remove Permissions"
If the selected platform was SharePoint.
- Open the SharePoint site
- Select appropriate folder
- Click on the share icon to provide people with access to that folder and sub-folders.
Removing ownCloud folder from local Hard Drive
If you are utilising the ownCloud Desktop Sync client, which allows you to sync the data from ownCloud server to a folder on your computer(s), then you will need to remove the ownCloud Desktop Sync client and the ownCloud sync folder.
There are 3 steps to this process, and they must be completed in this order.
1. Stop sync client
| Windows |
|
| Mac |
|
2. Uninstall sync client
| Windows |
|
| Mac |
|
3. Delete ownCloud folder from your local hard drive
| Windows | Open File Explorer. Find the ownCloud folder. Delete. |
| Mac | Open Finder. Find the ownCloud folder. Delete. |